Ever looked at a gold coin and wondered if it’s the real deal? It’s a common question, especially with how convincing some fakes can be. Learning how to test gold coins with acid is a skill that can give you a lot of confidence. This guide is all about that. We’ll walk through what you need, how to do it safely, and what the results actually mean. It’s not super complicated, but you do need to pay attention to the details.
Key Takeaways
- Testing gold coins with acid involves scratching a small amount onto a testing stone and applying specific nitric acid solutions to observe the reaction.
- Different acid strengths correspond to different gold karats; the goal is to find the highest karat acid that does not dissolve the gold streak.
- Proper safety measures, including ventilation and protective gear, are critical when handling nitric acid.
- Understanding how the streak reacts (dissolves, changes color, or remains) is key to interpreting the purity of the gold coin.
- While acid testing is reliable, it’s a slightly destructive method, and for high-value items or uncertain results, professional verification is recommended.
Understanding The Acid Test For Gold
The Role of Nitric Acid in Gold Verification
Nitric acid is the workhorse when it comes to the traditional acid test for gold. It’s a strong chemical that reacts differently with various metals. When you apply it to a streak of gold on a testing stone, its reaction tells you a lot. The key idea is that pure gold doesn’t react with nitric acid, but other metals mixed with gold, or metals used to imitate gold, will. Different strengths of nitric acid are used to test for different levels of gold purity, or karats. It’s like a chemical detective, helping to reveal what’s really underneath the surface.
Why Acid Testing Is A Reliable Method
This method has been around for ages, and for good reason. It’s pretty reliable for figuring out the karat of gold, especially for common jewelry. You get a streak of gold on a special stone, then you put drops of different acid solutions on it. You start with a weaker acid and move up. If the streak dissolves with a certain acid, you know the gold is less pure than that. If it stays put, you try a stronger acid. You keep going until you find the acid that doesn’t dissolve the streak. That tells you the minimum karat of your gold. It’s a straightforward process, and with a bit of practice, you can get pretty accurate results.
- Initial Scratch: Make a small mark on a testing stone.
- Acid Application: Apply specific acid solutions to the mark.
- Reaction Observation: Note how the mark reacts (or doesn’t react) to the acid.
- Purity Determination: Use the reaction to estimate the gold’s karat.
While effective, it’s important to remember that this test does leave a small mark on your testing stone and, if done directly on jewelry, a tiny scratch. It’s best to test on an inconspicuous spot or use a dedicated testing stone.
Limitations of Acid Testing for Gold
Now, it’s not perfect, you know? One big thing is that it’s a bit destructive. You have to scratch your gold onto a stone, or sometimes even scratch the item itself, to get a sample. This leaves a mark. Also, it’s not great for very thin gold plating. If something is just gold-plated, the acid might eat through the plating and react with the base metal underneath, giving you a false reading. And if you have really unusual gold alloys, sometimes the acid might not react the way you expect. It’s also not the best for super high-karat gold, like 24K, because it’s so pure it barely reacts to anything, making it hard to differentiate from other very pure metals.
- Slightly destructive nature.
- Difficulty with thin gold plating.
- Potential for unexpected reactions with unusual alloys.
- Less effective for extremely high-karat gold.
Essential Tools for Acid Testing Gold
To properly conduct an acid test on gold coins, you’ll need a few specific items. It’s not just about grabbing any old acid; precision and safety are key here. Think of it like a chemistry experiment, but for your valuable metals.
The Importance of a Testing Stone
A testing stone, often called a touchstone, is your canvas for this operation. These are typically made of unglazed ceramic or black basalt. The unglazed surface provides the necessary porosity to hold a small streak of metal from your coin. When you rub your gold coin against it, it leaves a fine powder, or streak, that the acid can then react with. Without this streak, the acid has nothing to test. Different stones are available, but a dense, unglazed black stone is generally preferred for its ability to show clear reactions.
Selecting the Correct Nitric Acid Solutions
This is where things get specific. You can’t just use any old acid. For gold testing, you’ll need a set of nitric acid solutions, each calibrated for a different karat level. Common sets include acids for 10K, 14K, 18K, and 22K gold. There’s also a separate acid for testing silver. The idea is to start with a lower karat acid and work your way up. If the streak dissolves with a 10K acid, you know it’s not even 10K gold. If it holds, you try the 14K acid, and so on. The goal is to find the highest karat acid that doesn’t dissolve the streak.
| Acid Strength | Expected Reaction on Streak |
|---|---|
| 10K Nitric Acid | Dissolves if below 10K |
| 14K Nitric Acid | Dissolves if below 14K |
| 18K Nitric Acid | Dissolves if below 18K |
| 22K Nitric Acid | Dissolves if below 22K |
| Silver Nitric Acid | Dissolves silver streak |
Protective Gear for Safe Handling
Working with acids, even diluted ones, requires caution. You absolutely need to protect yourself. This means wearing chemical-resistant gloves – nitrile gloves are a good choice. Safety glasses or goggles are also a must to prevent splashes from getting into your eyes. Always perform these tests in a well-ventilated area, like near an open window or outdoors, to avoid inhaling fumes. A lab coat or old apron can also save your clothes from accidental spills.
Remember, these acids are designed to react with metals. While they might not cause immediate severe burns in diluted forms, repeated exposure or contact with sensitive skin can be problematic. Safety first, always.
Step-by-Step Guide to Testing Gold Coins
Testing gold coins with acid might sound intimidating, but it’s a pretty straightforward process once you get the hang of it. It’s all about making a small mark and seeing how it reacts. The key is to be methodical and pay close attention to the details.
Preparing Your Gold Coin for the Test
Before you even think about touching acid, you need to get your coin ready. This involves creating a small streak on a testing stone. You’ll want to find an area on the coin that’s not easily visible, just in case. Gently rub the coin against the testing stone – a black, unglazed ceramic one works best – until you leave a visible mark. This mark is what the acid will interact with. It’s like leaving a little sample for the acid to analyze. If you’re testing multiple coins, make sure to create a separate streak for each one, maybe even labeling them lightly with a pencil if you’re worried about mixing them up.
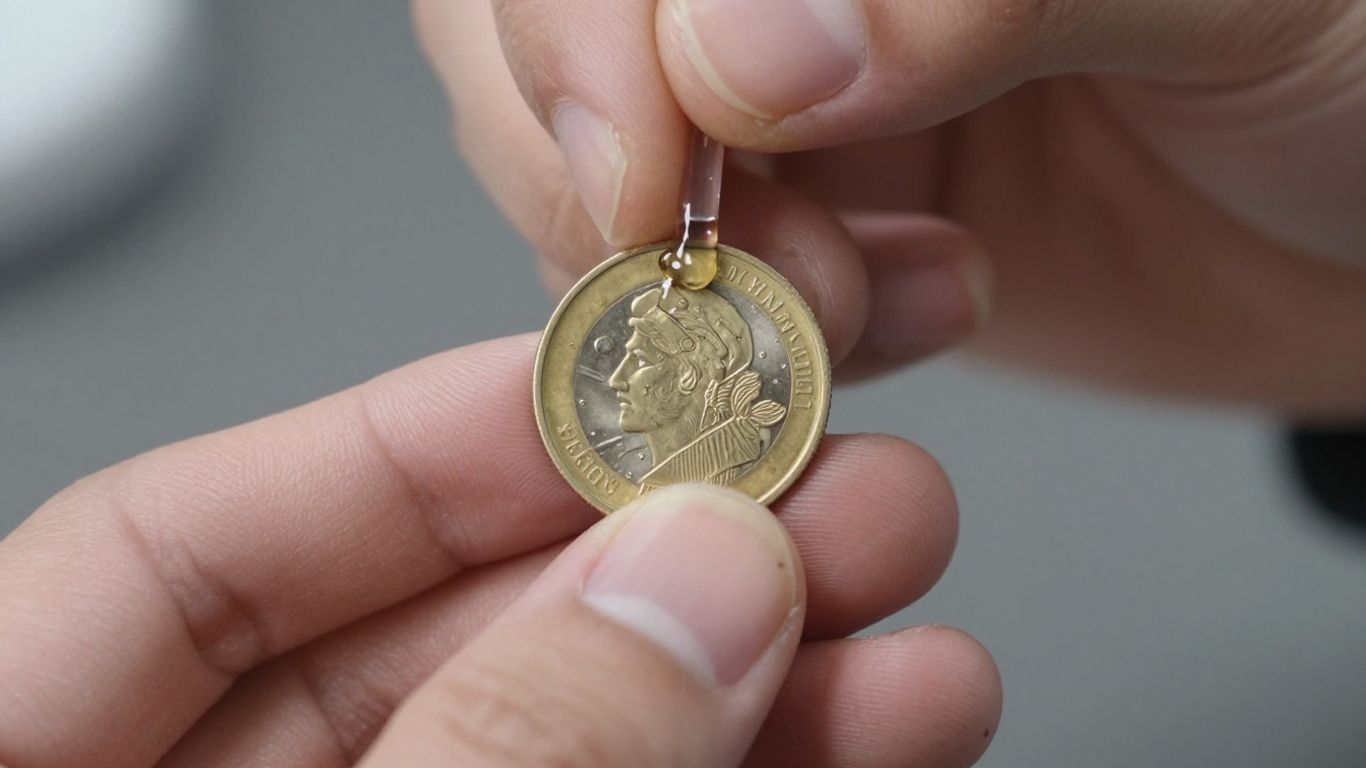
Applying Acid to the Coin's Streak
Now for the main event. You’ll need your nitric acid solutions, usually labeled for different karats (like 10K, 14K, 18K, 22K, and 24K). Start with the acid for the lowest karat you suspect your coin might be. Apply just a tiny drop directly onto the streak you made on the stone. You don’t need much, just enough to cover the mark. It’s important to work systematically. If you’re unsure of the karat, begin with a lower one and work your way up. This way, you don’t miss a potential reading. Remember to keep the acid bottles capped when not in use to avoid accidental spills or evaporation. This whole process is a bit like a chemical detective game, trying to pinpoint the exact composition.
Interpreting the Acid's Reaction
This is where you get your answer. Watch the streak closely after applying the acid. What happens? Does it dissolve? Does it change color? Or does it stay put?
- If the streak dissolves: This means the gold is of a lower karat than the acid you used, or it’s not gold at all. If it dissolves immediately, it’s a strong indicator of a fake. You’d then move to a lower karat acid to see if that reacts differently.
- If the streak remains unchanged: This is good news! It suggests your gold is at least the karat of the acid you applied. For example, if the 14K acid doesn’t affect the streak, your coin is likely 14K or higher.
The goal is to find the highest karat acid that does not react with the streak. If 14K acid leaves the streak untouched, but 18K acid causes it to dissolve, then your coin is most likely 14K. It’s a process of elimination, really.
This method is a classic way to test gold, and it’s been used for ages. While it’s not completely non-destructive, the mark left on the testing stone is usually minimal and easily cleaned. It’s a practical approach for getting a good idea of your coin’s purity.
Determining Gold Purity with Acid
Once you’ve made a streak on your testing stone, the real work of figuring out the gold’s purity begins. It’s like a puzzle, and the acid is your clue finder. You’re not just looking for a reaction; you’re looking for a specific lack of reaction to pinpoint the karat.
Identifying Lower Karats
When you start with the lowest karat acid you have, say for 10K gold, and the streak dissolves right away, that tells you something. It means the gold is either less than 10K or it’s not gold at all. If it dissolves, you’d try an even lower karat acid if you had one, but often, a quick dissolve means it’s likely a fake or a very low alloy. It’s a bit of a process of elimination.
Confirming Higher Karats
Now, if that 10K acid doesn’t dissolve the streak, that’s good news. It means your gold is at least 10K. The next step is to grab the acid for the next level up, maybe 14K. You apply that to a fresh streak (or a different spot on the original streak if it’s large enough). If that acid doesn’t dissolve the streak, you move up again to 18K, and so on. You keep going up in karat strength until you find an acid that does cause the streak to react – to dissolve or change color.
The Goal: Finding the Highest Non-Reactive Acid
So, what you’re really aiming for is the highest karat acid that leaves the streak completely untouched. Let’s say you test with 10K, 14K, and 18K acids, and none of them affect the streak. But then, when you apply the 22K acid, the streak starts to fizzle and disappear. That tells you your gold is 18K. The streak resisted the 18K acid, but it couldn’t stand up to the 22K. It’s a process of narrowing down the possibilities until you find the exact point where the acid starts to work.
The key is patience. You can’t rush this. Each step builds on the last, and a hasty move can lead you to the wrong conclusion. Always use a fresh streak for each acid test if possible, or at least a clean section of the stone.
Here’s a quick look at how the reactions generally play out:
| Acid Strength | Streak Dissolves | Streak Remains | Implication |
|---|---|---|---|
| 10K | Yes | No | Gold is less than 10K or not gold |
| 10K | No | Yes | Gold is 10K or higher |
| 14K | Yes | No | Gold is less than 14K |
| 14K | No | Yes | Gold is 14K or higher |
| 18K | Yes | No | Gold is less than 18K |
| 18K | No | Yes | Gold is 18K or higher |
Post-Test Procedures and Safety
After you’ve finished your acid tests, it’s important to clean up properly and handle your coin with care. This isn’t just about keeping your testing tools in good shape; it’s also about making sure you’re safe and that your coin isn’t damaged.
Rinsing and Cleaning Your Gold Coin
First things first, give your gold coin a good rinse. Use distilled water for this. Tap water can have minerals that might leave spots or react with any leftover acid. Gently rinse the coin under the water. The goal is to remove all traces of the acid. After rinsing, pat the coin dry with a soft, lint-free cloth. Avoid rubbing too hard, especially if you’re concerned about preserving any original luster or details on the coin.
Cleaning the Testing Stone
Your testing stone has likely seen some action, and it needs cleaning too. After rinsing the coin, you’ll want to clean the stone. You can usually do this by gently scrubbing the surface with a stiff brush and some water. For tougher residue, a bit of baking soda paste can sometimes help lift it. Make sure the stone is completely dry before storing it. A clean stone is ready for its next use and won’t contaminate future tests.
Responsible Acid Disposal
Disposing of leftover acid needs to be done carefully. You can’t just pour it down the drain. A common method is to neutralize the acid first. You can do this by slowly adding a neutralizing agent, like baking soda or a commercial acid neutralizer, to the acid in a well-ventilated area. Watch for fizzing, which indicates neutralization is happening. Once neutralized, it’s generally safer to dispose of according to your local regulations. Always check what your local waste disposal guidelines recommend for chemical waste. Proper disposal protects the environment and prevents accidents. If you’re unsure, it’s always best to consult with your local hazardous waste facility or look for professional appraisal services that can advise on safe handling.
Distinguishing Gold from Imitations
Recognizing Dissolving Streaks
When you scratch a gold coin on a testing stone, you create a streak. The acid test then reveals the true nature of that streak. If the streak dissolves quickly or changes color dramatically when a particular acid solution is applied, it’s a strong indicator that the metal is not pure gold. Different acids are formulated to react with specific gold purities. For instance, a streak that fizzes and turns milky or green when exposed to a 10K acid solution suggests it’s either not gold or a very low karat alloy. A streak that remains largely unchanged, showing only a slight dulling or no reaction at all, is a positive sign for genuine gold. The key is observing how the streak behaves under the acid’s influence. Imitations often react vigorously, showing their true, non-gold composition.
Identifying Non-Gold Reactions
Beyond simple dissolution, other reactions can point to imitations. Some base metals, when exposed to nitric acid, might turn a distinct blue or green color. This is a common reaction for copper-based alloys, which are frequently used in fake gold jewelry. If you apply an acid meant for, say, 14K gold, and the streak turns blue, you know it’s not 14K gold. It could be brass, copper, or another metal entirely. Even gold-plated items will show a reaction once the thin gold layer is breached by the acid, revealing the base metal underneath. The color and speed of these reactions are your clues.
When a Streak Indicates Genuine Gold
Genuine gold, when scratched and tested, will react predictably based on its karat. For higher karats, like 18K or 22K, the streak should show minimal to no reaction with the corresponding acid solution. It might darken slightly or become a bit dull, but it won’t dissolve, fizz excessively, or change to a green or blue hue. If you test a streak with 10K acid and it holds up, then try 14K acid and it also holds up, and so on, you’re moving towards confirming a higher purity. The goal is to find the highest karat acid that does not significantly affect the streak. This indicates that the gold’s purity is at least that high, or potentially higher.
The acid test is a process of elimination. You’re not just looking for a reaction; you’re looking for the absence of a strong, negative reaction with the appropriate acid. A streak that stubbornly resists dissolution or color change with acids designed for lower karats is a strong indicator of genuine gold purity.
Advanced Considerations for Gold Testing
Dealing with Very Low Karat Gold
Testing gold with very low karat values, like 6K or 8K, can be a bit tricky. These alloys have a lot of other metals mixed in, and the acid might react differently than you expect. Sometimes, even the lower-strength acids might show a reaction, or the streak might look dull. It’s important to remember that the acid test is best for higher karats. For these lower ones, you might need to compare the reaction to known samples of low-karat gold. The goal is to see if the streak dissolves or changes color significantly. If it holds up against a slightly stronger acid than expected for its supposed karat, that’s a good sign.
Understanding Unusual Alloys
Not all gold is mixed with the usual suspects like copper, silver, or zinc. Sometimes, you’ll run into alloys with less common metals. These can throw off the acid test because they might react in ways you haven’t seen before. For instance, an alloy with a lot of nickel might show a greenish reaction, even if it’s supposed to be gold. It’s a good idea to have a reference chart handy that shows how different metals react to nitric acid. This can help you figure out if you’re dealing with a strange alloy or something else entirely. If you’re unsure, it’s always best to get a second opinion.
When to Seek Professional Verification
There are definitely times when you should just hand it over to the pros. If you’re testing a really old piece, something with intricate historical details, or a coin that looks super valuable, messing around with acid might not be the best idea. Professionals have tools like XRF analyzers that can tell you the exact metal composition without damaging the item at all. They also have a lot more experience with weird alloys and historical pieces. For insurance purposes or if you’re planning to sell something valuable, getting a professional appraisal is the way to go. You can find these services at reputable gold buyers.
Here’s a quick rundown of when to call in the experts:
- Antique or Historical Items: Pieces from before the 1950s often have unique construction methods and may not be marked clearly.
- Unfamiliar Hallmarks: If the markings on the gold don’t match standard systems you recognize, a specialist can help decipher them.
- Suspicious Physical Traits: Items that feel unusually heavy or light, show strange discoloration, or react to magnets might need closer inspection.
- High-Value Collections: If you have a significant amount of gold or individual pieces worth a lot, professional verification is wise.
- Legal or Insurance Needs: For official valuations, appraisals are required.
Sometimes, the acid test is just the first step. If the results are unclear or the item is particularly significant, it’s wise to stop and consider other methods or professional help. Trying to force a conclusion can sometimes lead to mistakes or damage.
Comparing Acid Tests with Other Methods
While the acid test is a go-to for many, it’s not the only way to check if your gold is the real deal. Sometimes, you might want to use a few different methods to get a clearer picture, especially if you’re dealing with something valuable or just plain confusing. It’s like having a backup plan, you know?
Ceramic Plate Scratch Test Comparison
This one’s pretty straightforward. You take your gold coin and gently drag it across an unglazed ceramic surface, like the bottom of a plain mug or a tile. If it leaves a gold-colored streak, that’s a good sign it’s actual gold. If it leaves a black streak, well, that’s more like "fool’s gold" or some other metal. It’s quick, but it’s not super precise for figuring out the exact karat, and you have to be careful not to scratch your coin too much.
Limitations of Non-Acidic Tests
Tests like the ceramic scratch test are good for a basic check, but they have their limits. They can tell you if something is likely gold or not, but they won’t tell you if it’s 10K, 14K, or 18K. That’s where the acid test really shines, as it uses different acid strengths to give you a karat reading. Other simple tests, like seeing if a magnet sticks to it (it shouldn’t for real gold) or how quickly an ice cube melts on it (gold conducts heat well, so ice melts faster), are also useful indicators but not definitive proof on their own.
Complementary Testing Techniques
To really be sure, you can combine a few methods. Start with the simple stuff: does a magnet attract it? (No? Good.) Then, try the ceramic scratch test. If that looks promising, move on to the acid test for a karat reading. For really high-value items or when you’re just not getting clear results, professionals often use more advanced tools.
- Electronic Gold Testers: These devices use electrical conductivity to measure purity. They’re non-destructive, which is a big plus, but can sometimes be fooled by thick gold plating or unusual metal mixes.
- X-Ray Fluorescence (XRF) Analyzers: This is the high-tech option. XRF machines use X-rays to figure out the exact elemental makeup of the metal. They’re super accurate, completely non-destructive, and can even identify trace elements, but they’re expensive and usually found at professional shops.
When you’re just starting out or testing common items, the acid test combined with a few basic checks is usually enough. But for anything rare, expensive, or if the results seem off, it’s always wise to consider these more advanced or professional methods to avoid any surprises.
Safety Precautions for Acid Testing
Working with nitric acid requires a serious approach to safety. It’s not like mixing up a batch of cookies; this stuff can cause harm if you’re not careful. Always treat these chemicals with respect. Think of it like handling any potent tool – you wouldn’t use a chainsaw without understanding how it works and what safety gear to wear, right? The same applies here.
Importance of Ventilation
Nitric acid fumes are not something you want to be breathing in. They can irritate your lungs and throat. That’s why doing this test in a place with good airflow is a big deal. An open window is a start, but if you can do it outside or under a fume hood, even better. You don’t want those fumes lingering in your home.
Eye and Skin Protection
Acid splashes can happen, and they’re no joke. They can cause burns on your skin and, more seriously, damage your eyes. Wearing safety goggles is non-negotiable. A pair of chemical-resistant gloves will also keep your hands safe. It might feel a bit like gearing up for a science experiment, but it’s better to be safe than sorry. Consider wearing an old shirt or an apron too, just in case.
Keeping Acids Away from Children
This one should be obvious, but it bears repeating. Acids are dangerous, and children are naturally curious. Never leave your testing acids where a child could possibly reach them. Store them in a locked cabinet or a high, secure place. Make sure any used materials are also disposed of properly and out of reach.
Responsible Acid Disposal
What do you do with the acid after you’re done? You can’t just pour it down the drain. Most local regulations have specific guidelines for disposing of chemical waste. Often, you can neutralize small amounts of acid with baking soda (it will fizz!) before rinsing with plenty of water. However, it’s always best to check with your local waste management services for the correct procedure. Improper disposal can harm the environment.
Troubleshooting Common Acid Test Issues
Interpreting Ambiguous Reactions
Sometimes, the reaction on the testing stone isn’t a clear-cut dissolve or no-reaction scenario. This can be confusing, especially when you’re trying to pinpoint the exact karat of your gold coin. For instance, a streak might slightly change color or fizz a little without completely disappearing. This often happens with lower karat golds or alloys that have a mix of metals. A faint discoloration or a very slow reaction might indicate a lower karat than you initially suspected, or that the coin is plated. It’s important to remember that even 10K gold has a significant amount of alloy metals, which can sometimes lead to subtle reactions. If you see a slight greenish tint, that’s a strong sign of copper, a common alloy, but also a potential indicator of plating if the reaction is too strong or too fast.
Addressing Unexpected Results
What do you do when the acid test gives you a result that just doesn’t make sense? Maybe you’re testing a coin you’re pretty sure is 14K, but the 14K acid seems to dissolve the streak quickly. Or perhaps the 10K acid doesn’t affect it at all, which is also odd. Several things could be at play here. First, double-check that you’re using the correct acid for the karat you suspect. It’s easy to grab the wrong bottle. Also, ensure the streak you made on the testing stone is substantial enough. A tiny, faint scratch might not give a clear reaction. If you’re testing a coin that’s been handled a lot or has a patina, that surface layer might react differently than the core metal. Sometimes, it’s best to make a fresh streak in a less obvious spot. If you’re still stumped, consider that the coin might be plated. A plating layer can react differently than solid gold. You might need to try a [lower karat acid](e.g., 10K) to see if it dissolves the streak, which would point towards plating over a base metal.
When Results Are Unclear
There are times when, despite your best efforts, the acid test leaves you scratching your head. The streak might change color slightly, or perhaps it seems to resist the acid but not in a way that clearly indicates a specific karat. This is where patience and a systematic approach are key. Don’t rush the process. Allow the acid a minute or two to work. If you’re still unsure, consider the possibility of unusual alloys. Not all gold coins are made with standard purity mixes. Some historical coins or custom pieces might have unique compositions that don’t react predictably with standard testing acids. In these situations, it’s often wise to step back.
- Re-evaluate the streak: Ensure it’s a clean, solid mark on the stone.
- Test with multiple acid strengths: If you suspect 14K, try 10K, then 14K, then 18K to see the progression of reactions.
- Consider the coin’s origin: Is it a modern bullion coin or an older, potentially more complex piece?
When in doubt, especially with valuable items, it’s always best to consult a professional. They have access to more advanced equipment and the experience to interpret subtle reactions that might elude a home tester. Trying to force a conclusion with ambiguous results can lead to misidentification and potential financial loss.
If you’re dealing with a coin that seems to be reacting strangely, it might be worth looking into professional verification services. They can offer a definitive answer without damaging your coin.
Final Thoughts on Acid Testing Gold
So, we’ve gone over how to use acid to test gold. It’s not exactly rocket science, but you do need to be careful. Remember to always work in a well-ventilated spot and wear your gloves and eye protection. If the streak dissolves, the gold isn’t what you thought. If it stays put, you’re likely on the right track. It takes a bit of practice to get the hang of it, and knowing when to call in a pro for really valuable pieces is smart. Don’t let it scare you off, though. With a little patience, you can get pretty good at this.
Frequently Asked Questions
What exactly is the acid test for gold, and why is it used?
The acid test is a way to check if gold is real and to figure out how pure it is. It uses special liquids called nitric acid that react differently with gold depending on its purity. By seeing how the acid affects a tiny scratch of gold, you can get a good idea of whether it’s genuine and what karat it is.
What do I need to perform an acid test on gold coins?
To do this test, you’ll need a testing stone, which is usually a rough, unglazed ceramic surface. You’ll also need different nitric acid solutions made for testing specific gold purities (like 10K, 14K, 18K, and 24K). Don’t forget safety gear like gloves and eye protection, and make sure you’re in a well-ventilated spot.
How do I prepare my gold coin for the acid test?
First, find a small, not-too-obvious spot on your gold coin. Gently rub that spot against the testing stone to leave a thin streak of gold. This streak is what you’ll apply the acid to, so you don’t damage the main part of your coin.
How can I tell the purity of the gold based on the acid's reaction?
You start with the acid for the lowest karat you suspect. If the gold streak disappears when you add the acid, it means the gold is less pure than that karat. If the streak stays put, the gold is at least that pure. You keep trying higher karat acids until you find the one that *doesn’t* dissolve the streak – that tells you the gold’s karat.
What should I do after I've tested my gold coin?
After testing, it’s important to clean up properly. Rinse your gold coin with clean water and dry it well. You should also clean the testing stone to remove any acid residue. It’s also crucial to dispose of any leftover acid safely, following local rules.
Can the acid test tell me if something is fake gold?
Yes, the acid test is great for spotting fakes. If the streak dissolves completely and very quickly with even the lowest karat acid, or if it turns a strange color, it’s a strong sign that the metal isn’t real gold.
Are there any situations where the acid test might not be the best option?
The acid test is very useful, but it does leave a tiny scratch on the metal, so it’s slightly destructive. Also, if the gold is plated or has unusual metal mixtures, the results might be confusing. For very valuable items or if you’re unsure, professional methods like XRF scanning are better because they don’t damage the item at all.
What are the most important safety rules when using acid for testing?
Safety is super important! Always test in an area with good airflow, like outdoors or near an open window, to avoid breathing fumes. Wear gloves to protect your skin and safety glasses to shield your eyes. Keep all acids far away from children and pets at all times.